Advertisement

Europe for less with Youth/Student Discounts

The Dos and Don’ts of Using a Wheel Brush on Your Expensive Rims

Your expensive rims are not only a stylish addition to your vehicle but also an investment that deserves proper care and maintenance. One essential tool for keeping your rims clean and scratch-free is a wheel brush. However, using a wheel brushes requires some knowledge and technique to avoid damaging your valuable rims. In this article, we will discuss the dos and don’ts of using a wheel brush on your expensive rims to help you preserve their pristine condition and extend their lifespan.

DO: Choose the Right Wheel Brush

Selecting the appropriate wheel brush for your rims is crucial. Look for a brush specifically designed for wheels, preferably with soft bristles made of materials such as microfiber, synthetic fibers, or natural fibers like boar’s hair. These types of bristles are gentle on your rims and won’t scratch or mar the surface. Avoid using brushes with stiff bristles, as they can cause scratches and damage to your rims, especially if they are made of delicate materials like chrome or polished aluminum.

DON’T: Use the Same Brush for Different Parts of Your Vehicle

Using the same wheel brush for other parts of your vehicle, such as the body or tires, can transfer dirt, debris, and contaminants from one area to another, potentially causing scratches or damage. Always dedicate a separate wheel brush solely for cleaning your rims to prevent cross-contamination and ensure optimal cleaning results.

DO: Rinse Your Rims Thoroughly

Before using a wheel brush, it’s crucial to rinse your rims thoroughly with water to remove loose dirt, dust, and debris. This step helps prevent scratching your rims when you start brushing. Use a hose or pressure washer to spray water on your rims from top to bottom, making sure to reach all the crevices and tight spots.

DON’T: Use a Dry Wheel Brush

Using a dry wheel brush can cause friction between the bristles and your rims, potentially resulting in scratches or damage. Always dampen your wheel brush with water or a wheel cleaner before using it on your rims. The moisture helps lubricate the bristles, reducing the risk of scratching and ensuring a smooth and safe cleaning process.

DO: Use a Wheel Cleaner

Using a wheel cleaner specifically formulated for rims can help break down and remove tough dirt, grime, and brake dust without harming the finish of your rims. Follow the manufacturer’s instructions on the wheel cleaner bottle for the correct usage and dilution ratio, if applicable. Apply the wheel cleaner to your damp wheel brush and work it into a lather to effectively clean your rims.

DON’T: Use Harsh Chemicals or Abrasives

Avoid using harsh chemicals or abrasives, such as bleach, acid-based cleaners, or abrasive scrubbers, on your rims. These can damage the finish of your rims, strip off protective coatings, and cause discoloration or pitting. Stick to wheel cleaners specifically formulated for rims, and use a soft brush to avoid scratching or damaging your expensive rims.

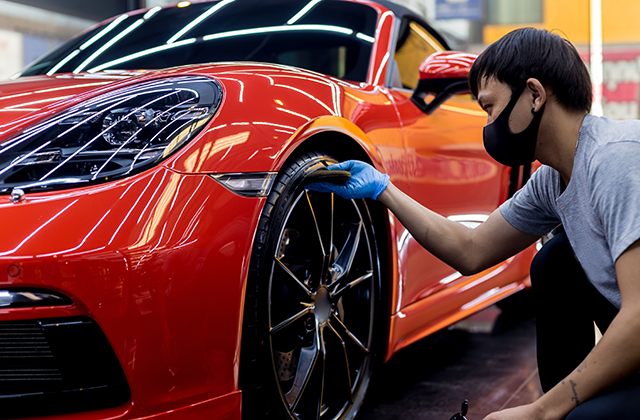
DO: Brush Gently and Thoroughly

When using a wheel brush, it’s important to brush gently and thoroughly to remove dirt and grime without scratching your rims. Use a back-and-forth motion, and pay attention to all areas of your rims, including the spokes, inner barrel, and around the lug nuts. Be thorough but gentle, and avoid applying excessive pressure that can potentially cause damage.

DON’T: Brush in Circular Motions or Use Excessive Force

Brushing in circular motions can create swirl marks and scratches on your rims. Avoid using circular motions or aggressive scrubbing as it can damage the finish of your rims. Also, refrain from using excessive force or pressing too hard on your wheel brush, as it can lead to scratches or abrasions on the rims. Let the bristles of the wheel brush do the work, and be gentle with your strokes.

DO: Rinse and Dry Thoroughly

After brushing your rims with a wheel brush, rinse them thoroughly with water to remove all the dirt, grime, and cleaning solution residue. Make sure to rinse all the crevices and hard-to-reach areas to ensure a complete clean. Once rinsed, dry your rims thoroughly with a clean microfiber cloth or a designated drying towel. Drying helps prevent water spots and streaks, leaving your rims looking sparkling clean and spotless.

DON’T: Air Dry or Leave Residue

Avoid air drying your rims after cleaning, as it can result in water spots and streaks, especially if you have hard water in your area. Additionally, leaving cleaning solution residue on your rims can lead to unsightly streaks or even damage the finish over time. Always make sure to dry your rims thoroughly after cleaning to avoid any water spots or residue.

DO: Inspect Your Rims

After cleaning your rims with a wheel brush, take the time to inspect them for any remaining dirt, grime, or missed spots. If you notice any areas that require further cleaning, use your wheel brush or a soft cloth to gently clean them. Regularly inspecting your rims helps you catch any potential issues early and maintain their pristine condition.

DON’T: Neglect Regular Cleaning

Regular cleaning is crucial to keep your expensive rims in top condition. Neglecting regular cleaning can allow dirt, grime, and brake dust to accumulate and damage the finish of your rims over time. Make sure to establish a routine cleaning schedule, depending on your driving conditions and environment, and stick to it to ensure your rims stay clean and protected.

DO: Apply Rim Protectant or Wax

To provide extra protection to your rims, consider applying a rim protectant or wax after cleaning. Rim protectants or waxes create a barrier between your rims and the elements, preventing dirt, brake dust, and other contaminants from adhering to the surface and making cleaning easier in the future. Follow the manufacturer’s instructions for the correct application and reapplication intervals.

DON’T: Use Your Wheel Brush on Hot Rims

Using a wheel brush on hot rims can cause the cleaning solution to dry quickly and leave residue or streaks on the surface. Additionally, the heat can make the bristles of the brush softer, increasing the risk of scratching your rims. Always wait for your rims to cool down before using a wheel brush for cleaning to ensure safe and effective results.

In conclusion, using a wheel brush on your expensive rims can be an effective way to keep them clean and well-maintained. By following the dos and don’ts mentioned above, you can ensure that your rims remain scratch-free, spotless, and in pristine condition. Regular cleaning, choosing the right brush, using a wheel cleaner, and being gentle in your approach are key factors in properly using a wheel brush on your expensive rims. With proper care and maintenance, your rims will continue to enhance the appearance of your vehicle for years to come. Visit us for car wheel brush.

Categories Car

Gorgeous Car Wrapping Examples to Inspire You

Vehicle wrapping is a great way to give a vehicle a whole new look while protecting the original paint job. A cost-effective alternative to repainting, wrapping is the right solution if you want to transform your vehicle’s appearance without paying for a full custom paint job. Even stickers Sydney put a stickers after wrapping it wont affect your paint.

Check out these gorgeous car wrapping examples from around the web. You’ll see that there are endless ways to customize your car with vinyl graphics in order to make it stand out from the crowd.

Cars are like canvases, just waiting for the artist to paint. Unlike canvases, though, cars can be displayed on highways and roadways all around the world.

If you have a little extra money to spend on the vehicle that moves you from place to place, consider car wrapping it. Car wraps come in a variety of colors and designs. Some people choose to wrap their vehicles with advertisements for their business. Others prefer a more artistic approach. There are also many options available when it comes to partial wraps or even car decals.

Car wrapping is one of the most exciting ways any vehicle owner can personalize his or her ride. If you’re interested in car wrapping but not sure where to begin, here are 11 examples of amazing car wraps to get your creative juices flowing.

Car wraps are a great way to give your vehicle a whole new look while protecting the original paint job. A cost-effective alternative to repainting, wrapping is the right solution if you want to transform your vehicle’s appearance without paying for a full custom paint job.

Car wrapping also protects your car’s paint from scratches and stone chips and enables you to change the appearance of your vehicle as often as you like.

It’s possible to wrap any part of your car: from hoods, roofs and trunks to mirrors, spoilers and panels. If you’re looking for inspiration for your next car wrap project, check out our collection of 15 amazing vinyl-wrapped cars.

Car wrap designs are getting more and more popular. That’s no surprise, considering that car wraps are the perfect way to express yourself. They’re also a great way to advertise your business or brand, without having to make any permanent changes to your car.

The only downside is that some people find it hard to come up with a compelling design for their vehicle. If you’re one of these people, maybe this collection of stunning car wrap designs will inspire you.

Whether you have a vehicle you want to turn into a personal statement or an entire fleet of cars you want to promote your business with, this collection of inspiring car wrap designs will give you plenty of ideas on how to approach the task.

Vehicle wrapping is a fantastic way to give your car, van, truck or other vehicle a new look while protecting the original paint job. A wrap is a large vinyl sticker that covers all or part of a vehicle’s exterior surface, like a giant, removable decal.

Wraps can be partial or full and can cover any kind of vehicle from cars to buses and boats. They are designed to withstand the elements, but can be removed without damaging the car’s original paint. Wraps can also have special finishes such as matte or metallic.

Car wraps are becoming increasingly popular for both personal and business vehicles, thanks to their versatility and impact. A wrap that looks like it was painted on can make your vehicle stand out in traffic and attract attention for your brand. Book now for appointment with us.

Categories Car

How Much Does a Skip Bin Cost?

Hiring a mini skips Adelaide to dispose of your waste can be an affordable and easy way to clean up around your home or workplace. If you’re looking at hiring a skip bin, it is important to find out how much it will cost.

Factors Affecting the Cost of Skip Bins

There are many different factors that affect the cost of hiring a skip bin. These include:

• The waste type

• The size of bin required

• Delivery and pick-up costs

• Length of time hired

Skip Bin Hire Cost Calculator

Skip Bin Hire Prices

Roughly speaking, you can expect to pay between $250-$600 for skip bins with a capacity between 2-9 cubic metres. Larger skip bins holding 10-15 cubic metres will cost between $800-$1200. Some companies will allow you to hire smaller bins for around $100, but this size is typically too small for household waste and not cost effective. The best thing to do is hire a medium sized skip so that you can fit all of your rubbish into it without having to hire multiple smaller ones.

The cost of a skip bin varies depending on a number of factors. These include the size of the bin, the location and duration that the bin is required for, as well as any additional loading costs.

Skip Bin Sizes

There are many different sizes that skip bins come in from 2 cubic meters to 30 cubic meters. The most common sizes are 3 cubic meters, 4 cubic meters, 6 cubic meters, 8 cubic meters and 9 cubic meters.

Skip Bin Prices

The cost of a skip bin depends on many variables these include: Skip Bin Size – Bigger bins do cost more to hire but are a better option if you have more waste to dispose of. Distance – If your location is further away then the cost will be higher. Duration – How long you keep the skip bin for will also affect the final price. Loading Costs – If the hirer overfills the skip bin or there is extra material that needs to be removed then extra charges may apply.

Of course, the cost of a skip bin depends on a number of factors. It is important that you consider the size of the bin and the type of waste you are disposing before making an enquiry.

Skip bin prices vary from region to region, generally speaking, skip bins are more expensive in urban areas as opposed to rural areas. Also, if you have a council or private property, the size and shape of your access will affect your price. For example, if your driveway is narrow or has restrictions such as height restrictions or weight limits then this may incur an additional fee.

Waste management is a huge issue in the world today. This is why there are so many companies offering skip bin hire services to help you dispose of your waste.

When deciding on which company to use, it’s important to look at the prices they offer, as well as the quality of their service and reputation. Some companies charge more than others, and some offer better customer service or better quality bins.

When you think of a skip bin, the first thing that comes to mind is probably rubbish. However, people use skip bins for all sorts of things, from home renovations and landscaping to moving house and cleaning out the attic. They’re an easy way to cart off all manner of unwanted items, but there’s one thing many people worry about: how much does a skip bin cost?

The great news is that it’s cheaper than you might think. With Skips Hub, skip bins are available for as little as $89 for one day!

You can also save by booking ahead. If you book your skip bin at least 5 days in advance, you’ll get a further 10% off the total price. Book in our website for skip bins for hire.

Categories Car